Hocus Pocus: DIY Trick-or-Treat Pails
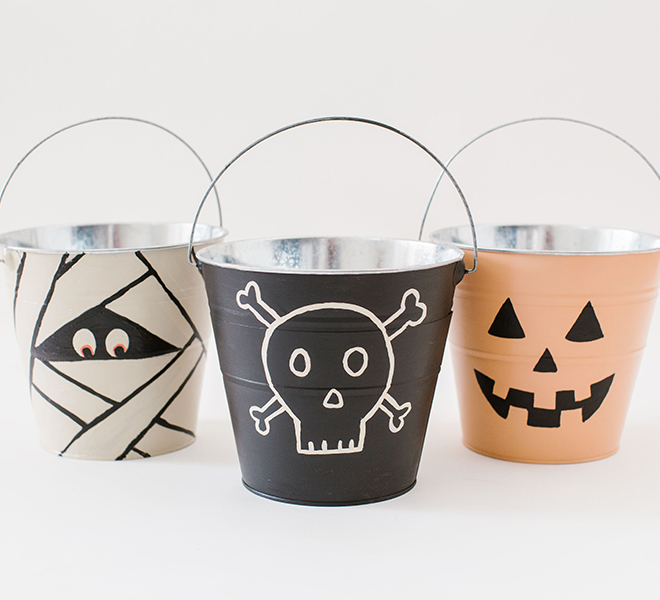
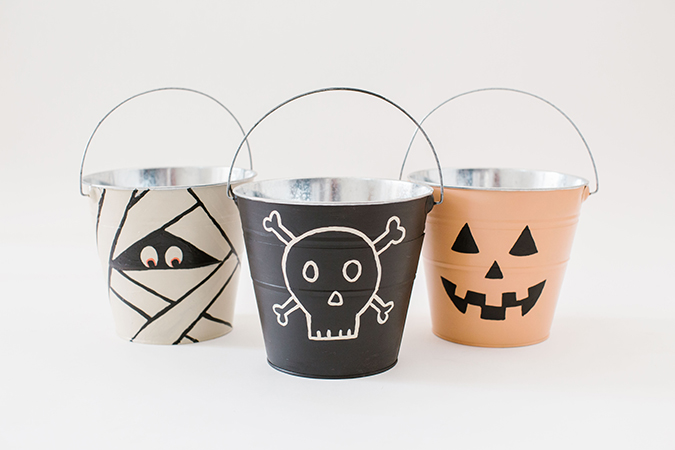
I’ve always loved celebrating Halloween, but seeing this spooky season through Liam’s eyes is extra special. While shopping for Liam’s very first trick-or-treat pail this year, I noticed that the selection definitely left something to be desired. Since there’s nothing I love more than whipping up a good Halloween craft, I decided to DIY my own version using classic metal pails and acrylic paint in slightly more subdued Halloween hues. Two of my best friends came over and we made a crafting day of it where we all painted pails for our little ones. Keep reading for the step-by-step on how to make my super spooky trick-or-treat pails…
Here’s what you will need:
- A metal pail like this one
- Black, orange, and off-white acrylic paint
- A set of large and small paintbrushes
- Paper plates
- Newspaper
- Pencil
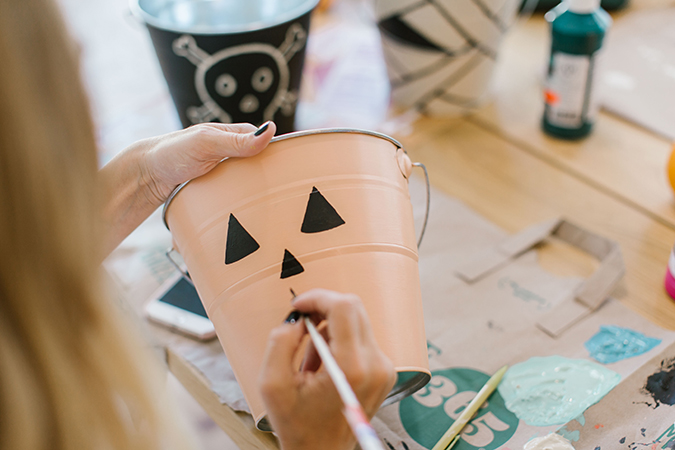
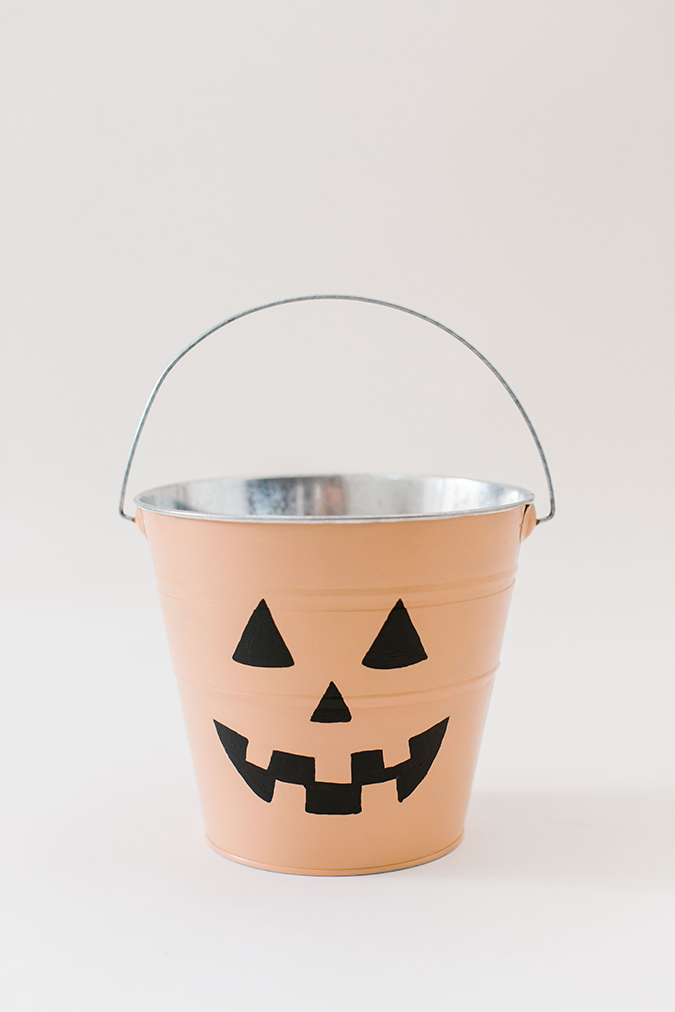
DIY Jack-O’-Lantern Pail:
1. To start, mix a small amount of off white paint with the orange paint, using a paper plate as a palette. This will give your pail a warmer tone.
2. Once you have your perfect shade, coat the whole pail using a large paintbrush and set aside to dry. The paint might take a while to dry, in which case you can use a hairdryer or place the pails out in the sun to speed up the process.
3. After the pail is dry, sketch out where you want the three triangles for the eyes and the nose to go.
4. Next, add in the grin. For this pail, I gave mine a wide smile, but you can paint yours however you want!
5. Fill in the outlined shapes with black paint and allow the pail to fully dry.
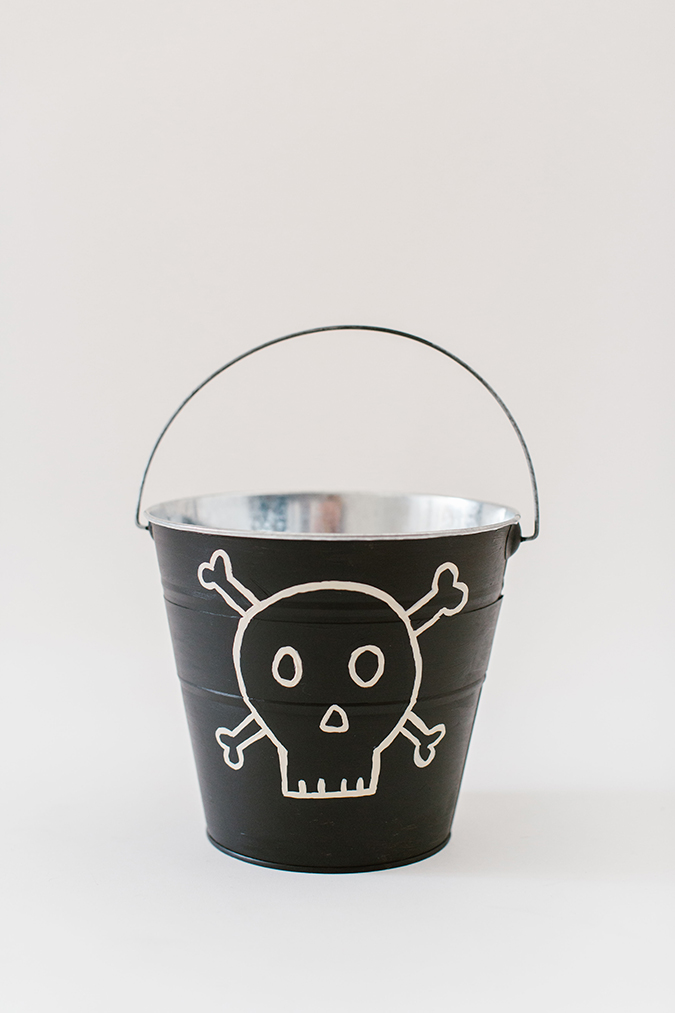
DIY Skull and Crossbones Pail:
1. Using a thick paintbrush, coat the entire pail in one to two layers of black paint. Make sure to let the coats dry thoroughly before moving on to the next step.
2. Using a pencil, lightly trace the outline of the skull—it should look like a circle connected to a smaller square.
3. Next, sketch out the eyes as two circles and the nose as a triangle in the center of your skull. Add a few lines for teeth at the bottom.
4. Add four crossbones behind the skull, making sure they line up with each other.
5. Now you’re ready to paint. Using a smaller paintbrush, paint over your sketched out lines in off-white acrylic paint and leave your pail out to dry.
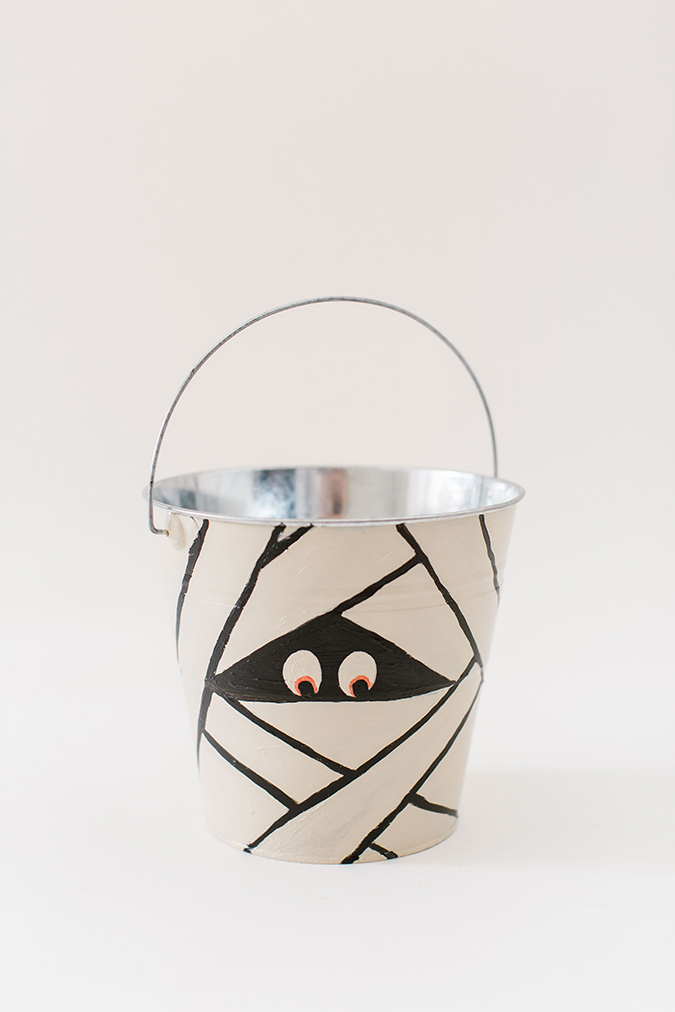
DIY Mummy Pail:
1. Start by painting the entire pail with a layer of off white paint. Let dry.
2. Next, sketch out the lines of the mummy’s wrappings- these don’t need to be perfect, since they’re supposed to look like fabric.
3. In the center of the pail, leave a triangle shape where you will draw the eyes. This will look like the mummy is peeking out of the wrappings.
4. Start tracing over your sketched lines with a small black paintbrush. When you reach the triangle, paint this completely black. Let the pail dry completely.
5. To make the eyes in the center of triangle, paint two white ovals. These will be your mummy’s eyes. Once they’re completely dry, add a smaller black oval at the bottom of each one to form the pupil. Then, using a thinner brush, trace around each black oval using orange paint.
What other spooky pails should I make this Halloween?
Let me know in the comments!
XO Lauren
Shop This Story…

Photos: Jessi Burrone for Laurenconrad.com
Affiliate links may have been used in this post.
