DIY: Woven Wall Hanging

If you’re following me on Instagram, you may have seen that I was making a DIY wall hanging for Liam recently. I received a lot of comments inquiring about how it turned out, so I thought I’d share the finished product plus a full tutorial for the same type of tapestry here on the blog.
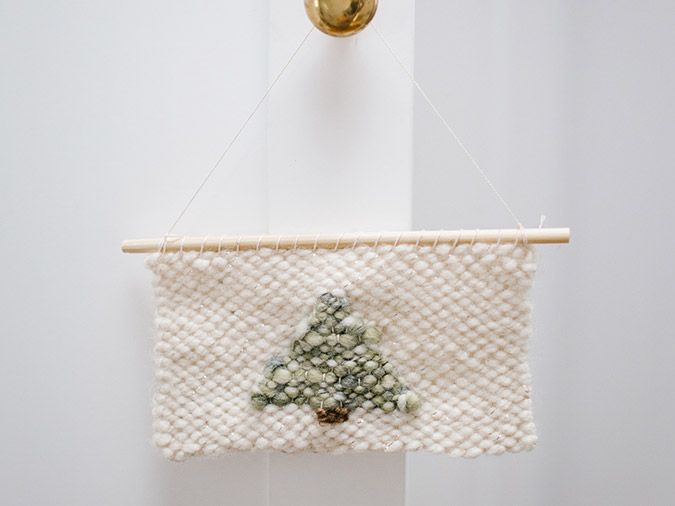
The wall hanging I made for Liam Was about three-feet wide and had his name spelled out. Patience is key if you’d like to make a large-scale weaving like that one. I probably spent about 30 hours total on my Liam wall hanging. (Let’s just say I spent a lot of cozy evenings at home when I was pregnant…) But if you don’t have 30 hours to spare, you can also make a small and simple design like the Christmas tree below in much less time. It makes an adorable piece of holiday décor that you will have for years to come or a thoughtful handmade gift for almost anyone on your list. Check out the tutorial for my holiday wall hanging below…
DIY Loom
Here’s what you will need:
Here’s how to make it:
1. Place your canvas in front of you with the backside facing up. This is the side you will be using to make your loom.

2. Push the pushpins into the wood frame all along the top and bottom of your canvas. The closer they are together, the tighter you’re weaving will be. As you can see in the photo, mine are pretty much touching each other.

3. Tie the twine onto the pushpin in the upper left-hand corner. Then, wrap it down and around the pin in the bottom right corner, and back up again, around the second pin from the left on top. Continue wrapping the twine around the pins in this zigzag type of motion. When you get to the end, tie it off again.
DIY Woven Wall Hanging
Here’s what you will need:
- graph paper and pencil
- a set of chopsticks or knitting needles (you can use a broomstick for a large loom)
- yarn in the colors of your choice (for a Christmas tree design like mine you will want cream for the background, green, and brown)
- a fork
- scissors
Here’s how to make it:

1. Before you begin, it helps to sketch out your design on graph paper. That way you can count out where to start and make sure your design is centered on the loom.

2. Once you’ve done that, take one of your chopsticks, and at the very top of your loom, weave it over one thread and under the next, in order to create a clear pathway to make weaving the yarn through much quicker and easier. (This step is technically optional since you could just weave the yarn through by hand, but it’s a major timesaving hack!)
3. Then, cut a length of yarn long enough to use throughout the loom, and tie it to the end of your other chopstick like a needle and thread. Weave it through right under the other chopstick that is already stuck in the loom. It should slide through very easily! You can now remove that top chopstick.

4. Repeat steps 2 and 3, going in the other direction. Every few rows, use your fork to gently push the rows up so that your weaving stays tight (but leaving enough space at the top to tie it off when you’re done).
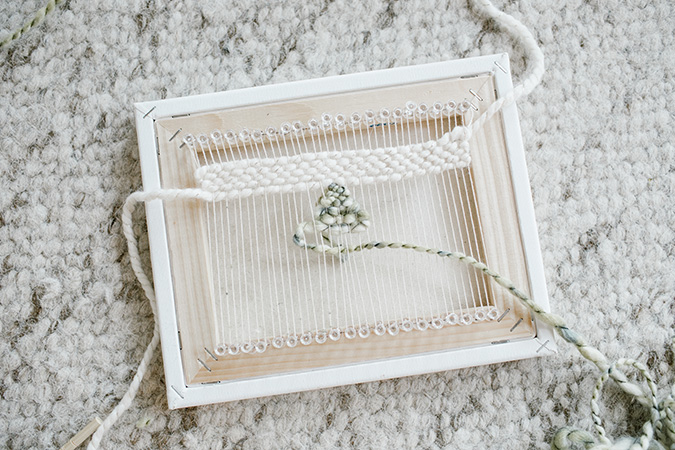
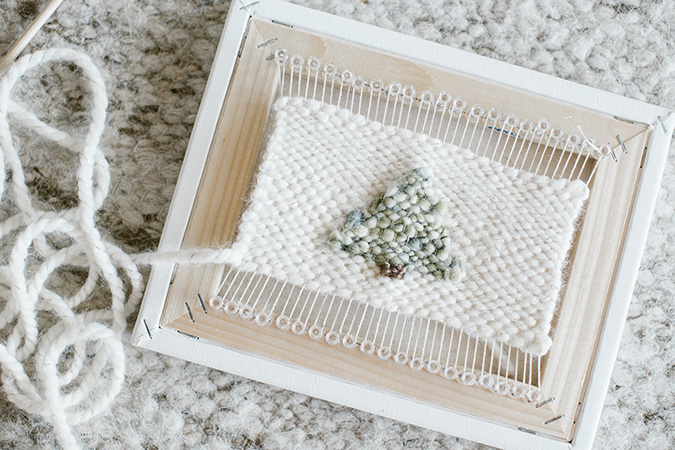
5. Once you have done several rows of just the background color (I did 5 rows of white at the top of my small Christmas tree weaving), switch to the green yarn and weave it back and forth in the middle, following the graph paper mockup to make your tree or other design. Complete the entire tree, and then return to filling in the background color around it.
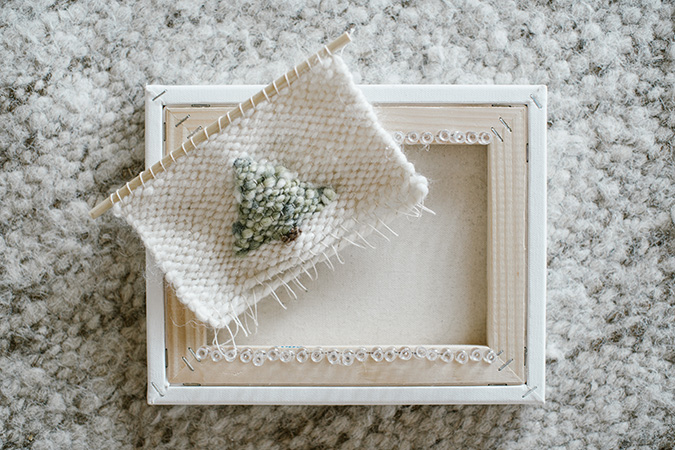
6. Once you have completed your weaving, slip a dowel or stick through the loops on the top to create a hanger for your tapestry. On the bottom, snip each loop of twine off of the pushpins, and tie each pair of strings off in a knot to finish it off.
There you have it! It might seem a bit complicated at first, but the nice things about handmade tapestries is that if they are imperfect they still look beautiful. So feel free to experiment with your own design and practice on different sized looms. I gave this wall art a holiday twist, but once you get the hang of it you can design any type of wall hanging that you like.
Are you going to give it a try?
Let me know below!
XO Lauren
Photos: Jessi Burrone Photography for LaurenConrad.com; Elizabeth Messina
Affiliate links may have been used in this post.
