Edible Obsession: Caramel Covered Apple Cider Marshmallows
When autumn makes an appearance, it feels like the official kick off to the holidays. And you know what that means, right? Baking season is in full swing and will be until we ring in the New Year. Although it isn’t quite time to start planning annual cookie plates just yet, it’s never a bad idea to arrive at a party with some sweets for the host… and the next couple of seasons are full of parties. After all, I have an eat, drink, or burn it rule when it comes to gift giving. So during our latest photo shoot, my team and I enlisted the help of baker Lauren Lowstan to whip up a dessert that is easy enough to serve or gift. What she created was genius: seasonal flavor-infused marshmallows gently wrapped in homemade caramel.
I’ve tried my hand at homemade marshmallows before, but never thought to coat them in rich caramel. What makes this treat so unique is that you can cut them up into bite-sized pieces and individually wrap them to make a one-of-a-kind and delicious gift. While this recipe may be a little time intensive, the outcome is well worth the time spent in the kitchen. Keep scrolling to see how you can replicate them below…
Ingredients:
For the apple cider marshmallows:
- 1 cup spiced apple cider
- 7 ½ teaspoons gelatin
- ½ cup water
- ¾ cup brown sugar
- ¾ cup sugar
- 1 cup tapioca/cassava syrup*
- ¼ teaspoon salt
- ¼ teaspoon cinnamon
- ¼ teaspoon allspice
- ¼ teaspoon cardamom
- 1 teaspoon vanilla
- 2 tablespoons cornstarch
- 2 tablespoons powdered sugar
For the caramel:
- 2 cups sugar
- 2 cups heavy cream
- 1 cup light tapioca/cassava syrup*
- ½ teaspoon salt
- 4 ½ tablespoons butter
- 1 teaspoon vanilla
*You can use corn syrup if you prefer.
Instructions:
1. Start by reducing your apple cider for the marshmallows. In a small saucepan, heat your apple cider over medium high heat and simmer until it has reduced to 1/2 cup. Place in the fridge to cool.
2. Combine the cornstarch and powdered sugar in a small bowl.
3. Spray a 13″x9″ pan with oil or butter and cover entirely with the cornstarch and powdered sugar mix. Save a little extra for the tops of the marshmallows.
4. In the bowl of an electric mixer fitted with a whisk attachment, add the cooled reduced apple cider and gelatin and whisk lightly until combined. Set aside to bloom.
5. In a medium saucepan, combine the water, sugars, tapioca syrup, salt, all of the spices and whisk until combined.
6. Turn the heat to medium and let it come to a boil and continue boiling until it reaches 240 degrees. Once it hits 240 degrees, take it off the heat.
7. Turn your mixer onto its slowest speed and break up the bloomed gelatin.
8. With the mixer still running on low, slowly add in the hot sugar mixture. Once it is all added, you can bump the speed up to high and whisk until your mixture is glossy and thick and at least double in size.
9. Add in the vanilla and whisk one more time to incorporate.
10. Working quickly, spread the marshmallow mixture into your prepared pan and spread the top until somewhat smooth.
11. Sprinkle the reserved cornstarch and powdered sugar mixture onto the top and lightly press down with the palms of your hands to smooth the top.
12. Set aside to firm for several hours or overnight.
13. While your marshmallows are cooling, you can make the caramel layer.
14. Heavily spray or butter a baking sheet. Make sure it has sides and is around 12″x18″.
15. In a large saucepan, combine sugar, heavy cream, tapioca syrup, and salt and whisk until combined. Turn the heat to medium and consistently stir, with a wooden spoon, until your mixture is boiling.
16. Once your mixture has started to boil, reduce heat to medium low, stop stirring and let it continue to boil for another 5 minutes.
17. Make sure not to turn up your heat at this point. Making candy requires some patience!
18. Add in the butter and continue to boil until your mixture hits 250 degrees. This will take about 30-45 minutes.
19. Once you’ve hit 250 degrees, take your pan off the heat, add the vanilla in and stir.
20. Carefully and quickly pour your caramel onto your buttered baking sheet. Spread it out as fast as possible until the whole pan (or most of it) is covered. Set aside to cool down for about an hour.
21. Once your marshmallows are firm, pop them out of the pan and cut them into 1-inch strips. Set aside on your work surface.
22. Once your caramel is firm enough to handle, take it off of the baking sheet. I had to run a knife around the edge of the pan to loosen it up a bit.
23. Cover your work surface with parchment paper and turn your caramel over onto it. You’ll want to cut your caramel block into about 3-inch wide strips. But to make sure, you can place one marshmallow strip onto the top of the caramel block, and lightly fold the caramel over onto the marshmallow strip. You want the caramel to be able to cover all sides of the marshmallow.
24. Cut your caramel block into strips.
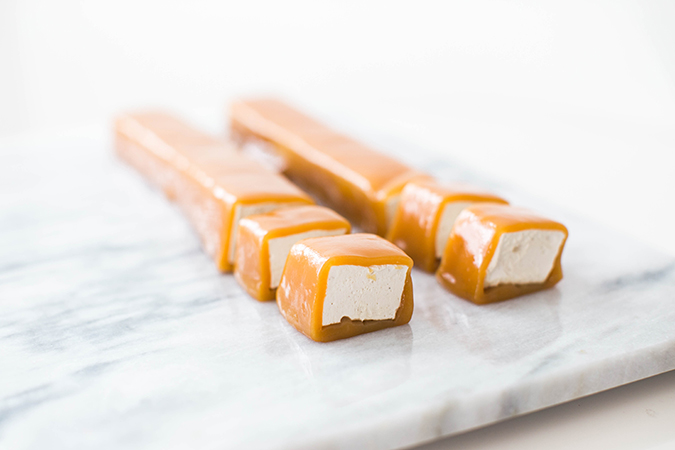
25. Place one marshmallow strip onto the middle of one caramel strip. Roll the caramel firmly over the marshmallow and pinch hard to seal the edges together.
26. Repeat until all of your caramel is used. (You will have extra marshmallows. Use them in hot chocolate or toast them for s’mores!).
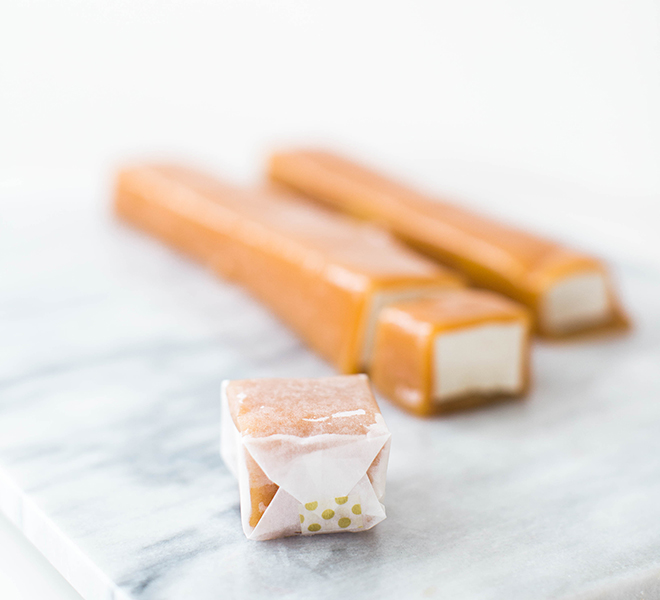
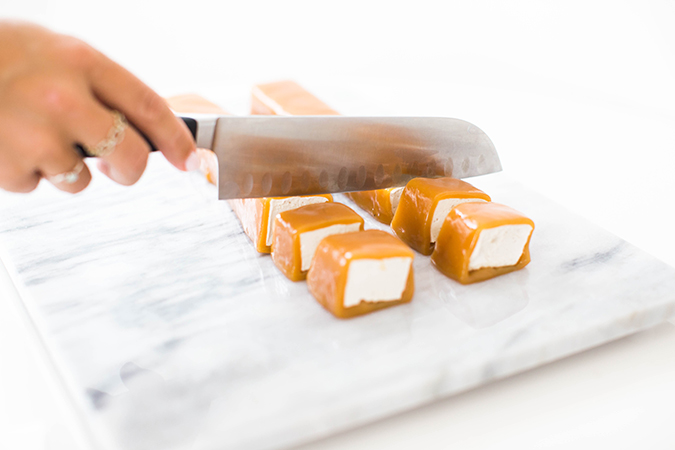
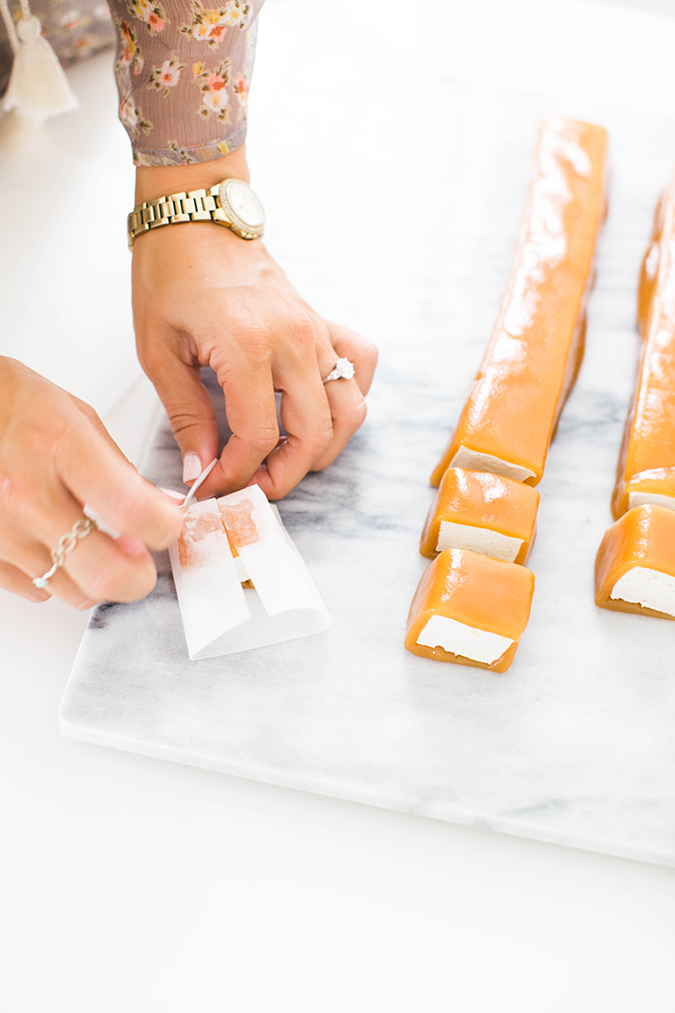
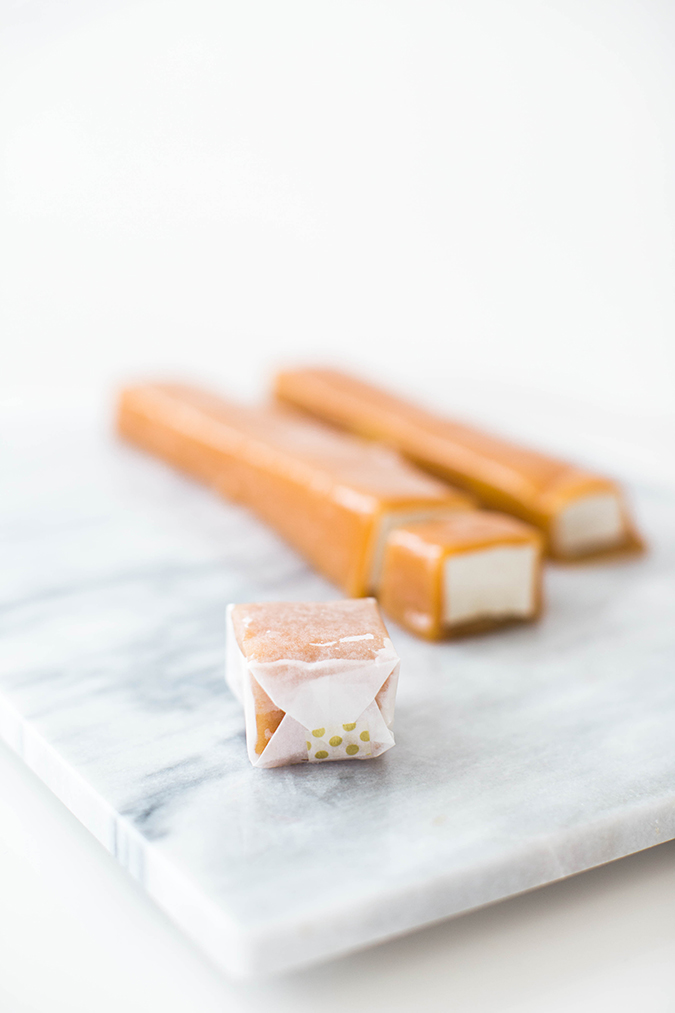
27. Now it is time to cut your logs into small squares. Make sure you use your sharpest knife. You can always refrigerate your logs for about 10 minutes to make cutting a little easier.
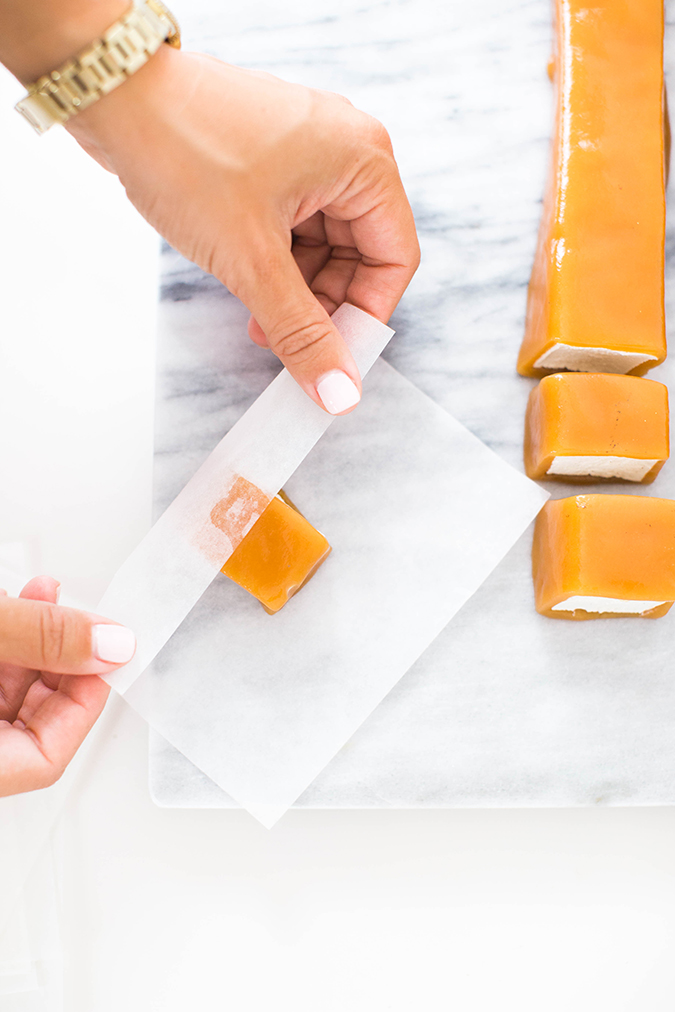
28. Wrap your individual caramels in parchment squares for gift giving, or store in an airtight container for up to a week.
Talk about decadent. To any of my friends reading this, don’t be surprised if these little treats show up at your door in the coming months.
Will you be making these caramel covered marshmallows?
Let me know if you do in the comments!
XO Lauren
Photos: Jessi Burrone for LaurenConrad.com
Affiliate links may have been used in this post.
