Beauty School: Cozy Woven Fall Braid Tutorial

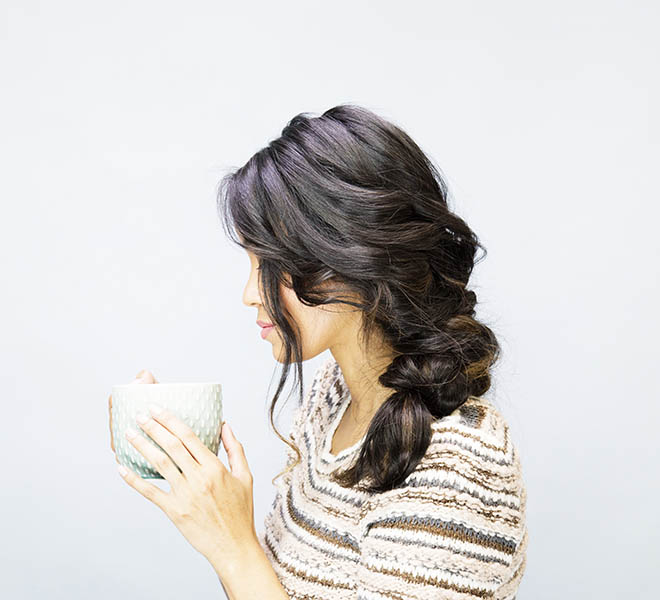
Hello LC.com Readers! It’s Maritza Buelvas of BeautyforBloggers here with another fun hair tutorial—and this one is primed perfectly for the cozy seasons ahead! Consider this the perfect breezy braid to complement that chunky sweater or your favorite throw—and best of all its super easy to DIY.
To keep your braid lush and full from all angles, I recommend you use a thickening texture spray and a few well-placed, traceless extensions to elevate your look. I used Kristin Ess’ Working Texture Spray at the beginning, middle and end when styling this look for maximum fullness. Ready for the full tutorial? Here it is!
We Used These Products…
- Kristin Ess’ Working Texture Spray (for ultimate texture and staying power)
- Bohyme Halo Extension (for additional volume everywhere)
- Sectioning comb (to section and create lift)
- Hairpins + two clear elastics (For finishing and hold)
Step 1:

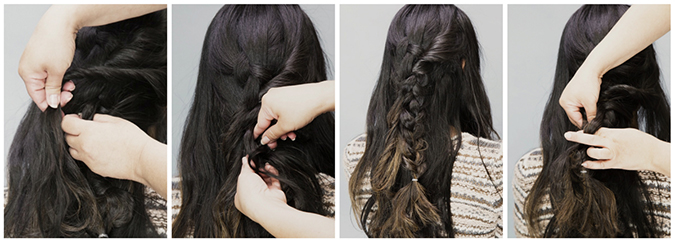
- Create a reverse 3D French braid (starting at the crown) along the middle back of the head.
- Braid from underneath, versus over top, to give your braid added fullness.
- Hold your braid in place with a clear elastic band.
- Use texture spray at the start of creating your braid to give it grip and at the end to tug at the sides to create further dimension.
Step 2:

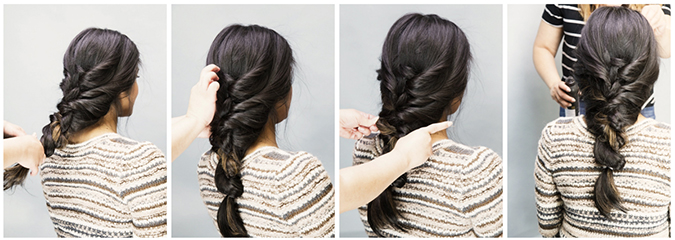
- Begin taking strands from each side of the head and roping it to “thread it” through the braid you just created. Creating a layered mega-braid!
- Continue doing this until all your hair has been “threaded” through your braid.
- I recommend “threading” each roped section in a figure-8 to weave the length of the rope down the length of your braid.
- The finished look will be a gathered full braid.
- Remember to twist/“rope” your natural hair with your extension for a full, seamless finish.
Step 3:

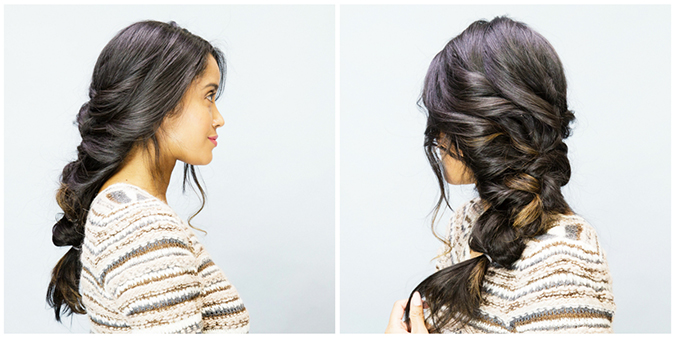
- Once you’ve “threaded” all your hair into a woven masterpiece, hold your finished style in place with another clear elastic band at the end.
- Tuck and hold any loose sections with hairpins.
- Layer again with texture spray and tug along the length of your style for the flirtiest fullness possible. For further hold, set with more texture spray or use my favorite finishing spray.


And there you have it! Tell us…
Will you be trying this easy, layered braid for fall?
Please sound off below and let us know what other hair tutorials you’d like to see. And thanks again to Maritza for this gorgeous woven braid tutorial!
XO Team LC
Hair: Maritza Buelvas, @beautyforbloggers
Model: Lindsey Gonzalez
Affiliate links may have been used in this post.
