DIY: How to Make a Festive Fall Balloon Arch
This post is sponsored by Balloon Time, a brand we love and use for so many of our celebrations!
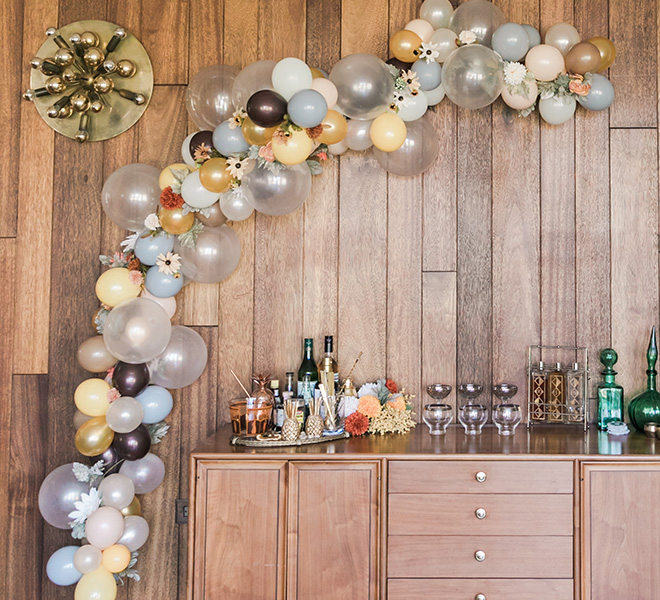
And just like that, we’re entering our absolute favorite time of year! There’s just something about the holiday season that’s a little extra magical. Whether it’s the flavors, the foliage, or the quality time spent with family and friends, we can’t wait for all that’s to come over the next couple months. Thanksgiving has to be one of our favorite holidays, and lately we’ve been dreaming up so many fun and festive ways to celebrate Turkey Day with our nearest and dearest. We wanted to do something a little bit different with our Thanksgiving décor, so we partnered with our friends at Balloon Time to create a whimsical, autumnal balloon arch that you can style anywhere you’ll be serving food, drinks or desserts for the big get-together.
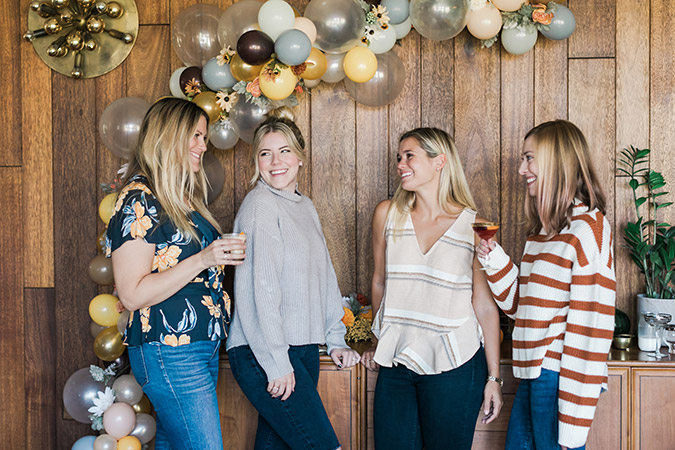
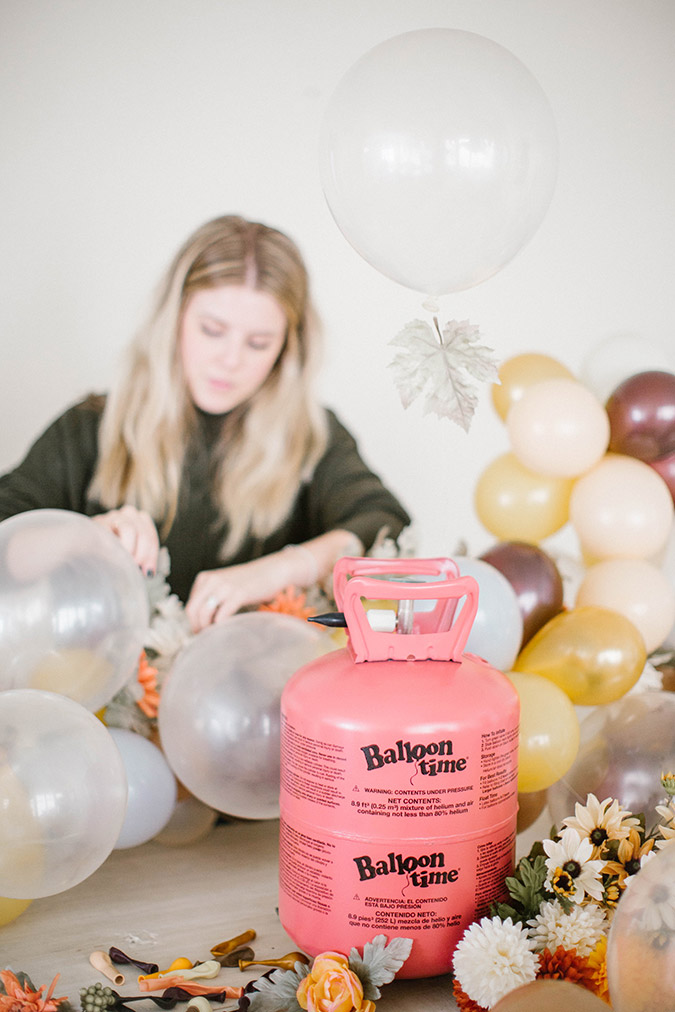
A few weeks back, we organized a fun Friendsgiving brunch with a bunch of our blogger friends, and wanted to create a piece of décor that would stand out, make a statement, and add a little extra whimsy to our gathering. Using the Balloon Time Helium Tank, lots of balloons, some faux florals, and a good amount of fishing wire, we created this gorgeous balloon arch that’s perfect for any fall gathering.
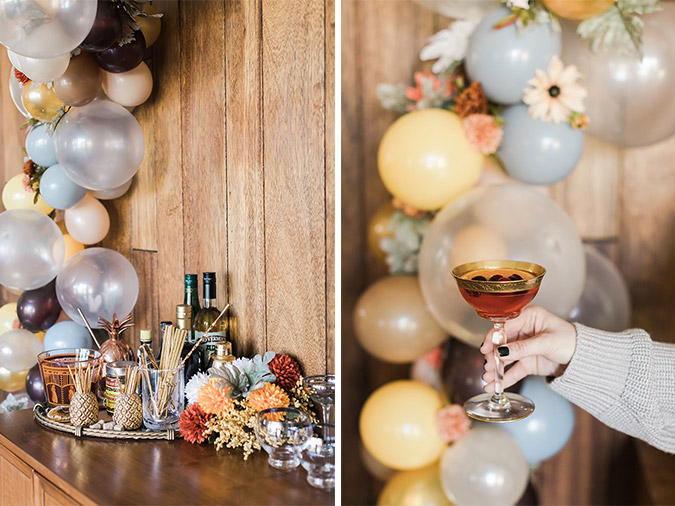
We styled our balloon arch above a cocktail bar, which made it even more fun to mix up a drink. However, you can put your balloon arch in any spot that makes sense for your own celebration. An arch like this would look beautiful hung over a dessert table, on the wall next to the dinner table, or even in an entryway.
And the best part? This festive balloon arch doubles as a great photo backdrop, too! So to inspire your Thanksgiving celebrations (or really any fall festivities you have coming up), today we’re sharing the step-by-step tutorial of how we created this pretty piece of balloon art, and giving you all of the info you need to create one of your own.
So, without further ado, here’s how we created this whimsical balloon arch, inspired by the flavors, colors and foliage of the fall holidays.
You Will Need…
- Balloon Time Helium Tank
- An assortment of large and small balloons, in the color palette of your choice
- Fishing wire
- Flowers or greenery (we used a faux flower garland so that it would last longer)
- Command hooks
- Step stool
How to Create Your Own Balloon Arch
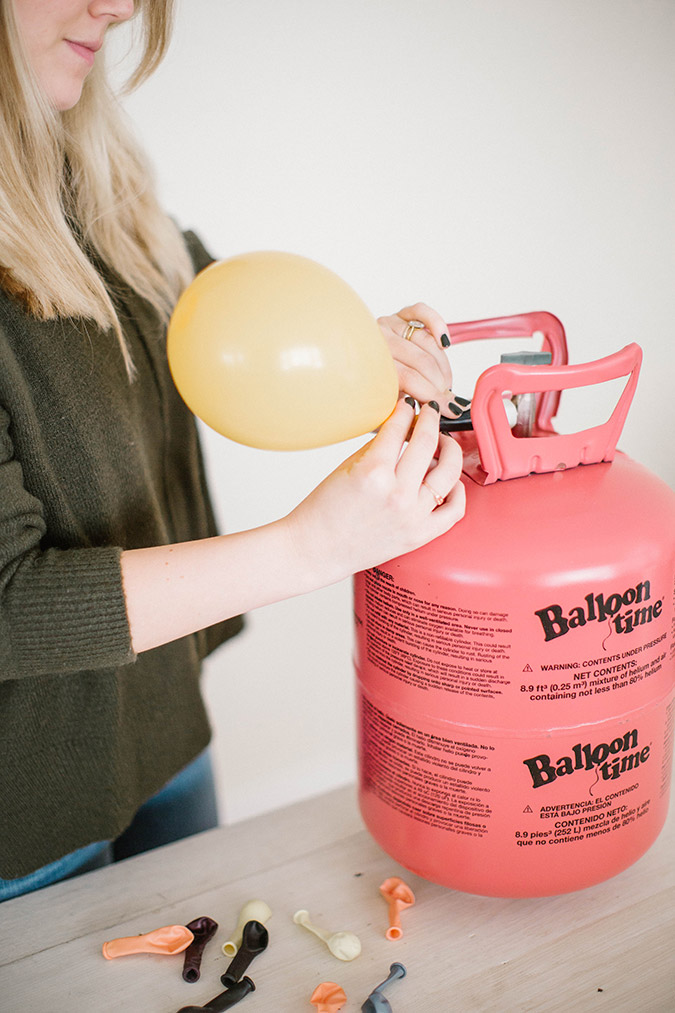
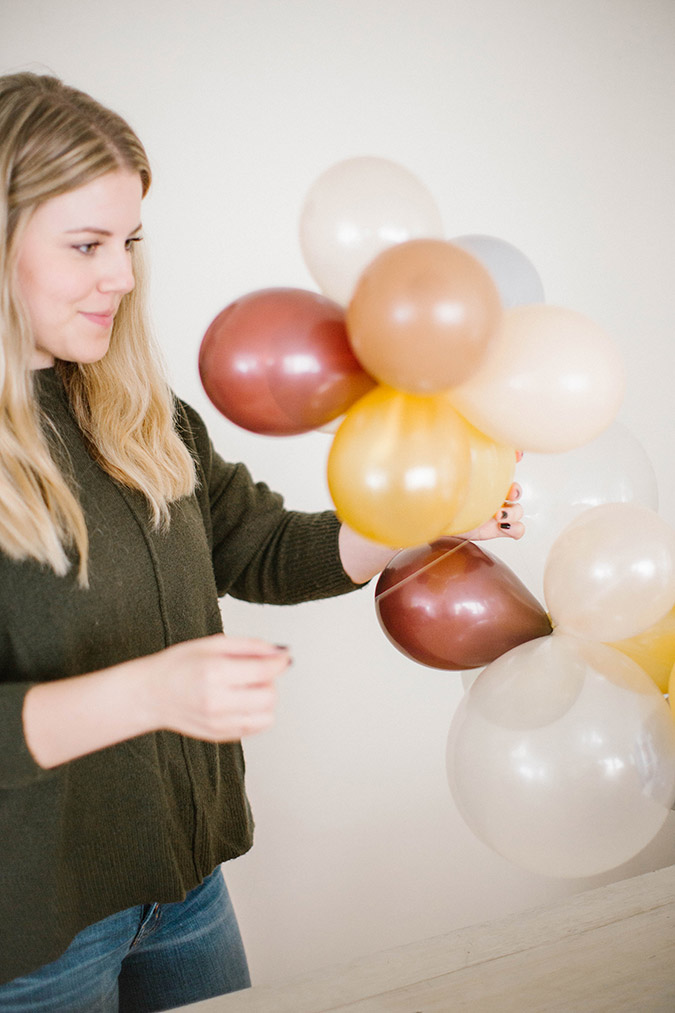
1. Using the Balloon Time Helium Tank, start by blowing up a bunch of your smaller sized balloons in various colors (or just 8 at a time, repeating for each balloon cluster) and tie a knot in the end of each balloon.
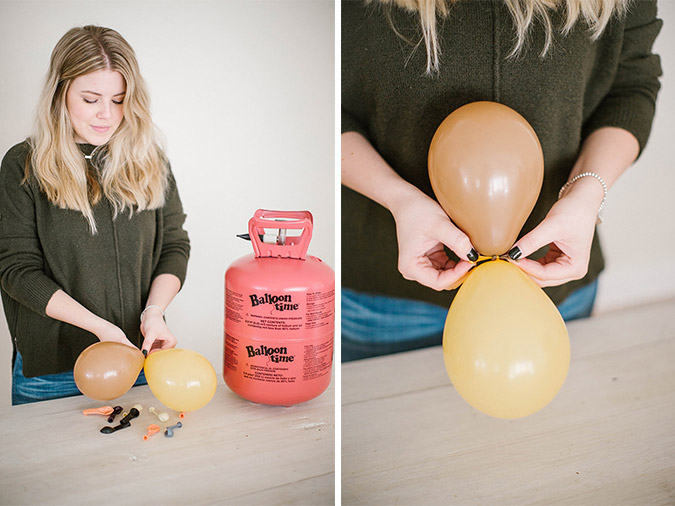
2. Take two of your balloons and tie the ends together in a double knot. Repeat this step with two more balloons.
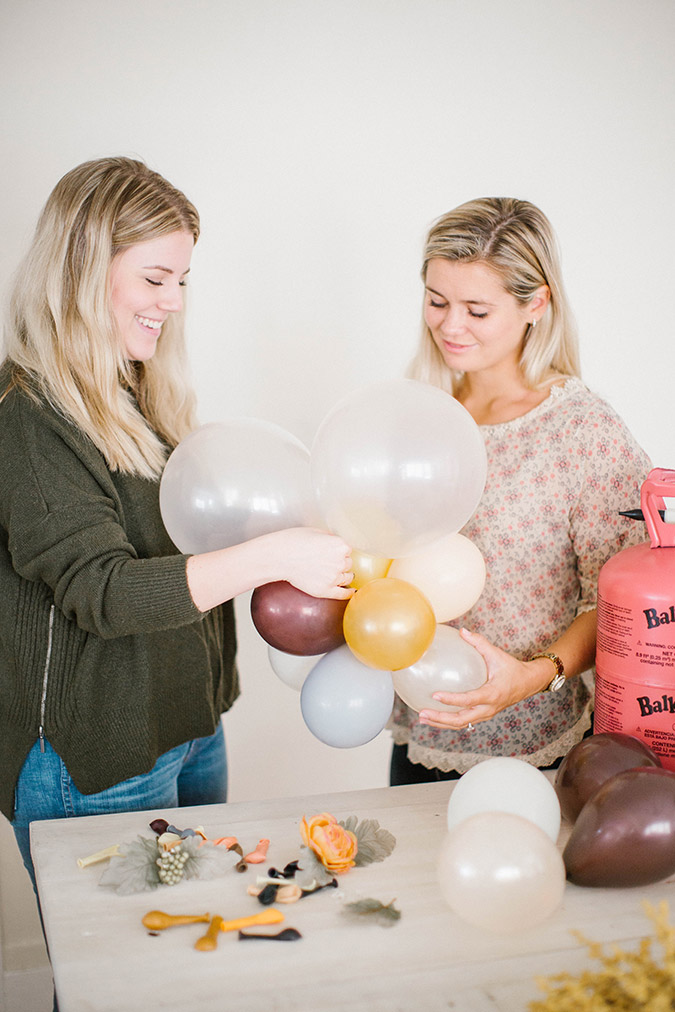
3. Take your two separate balloon pairs, and cross them in the middle so the knots are overlapping each other. Twist the two balloon pairs 3-5 times in random directions, until they are sufficiently bound together in a cluster of four.
4. Once you have your cluster of four balloons, add another balloon pair to your cluster, using the same twisting motions you used with the first balloons. Repeat this step one more time, until you have a cluster with a total of eight balloons.
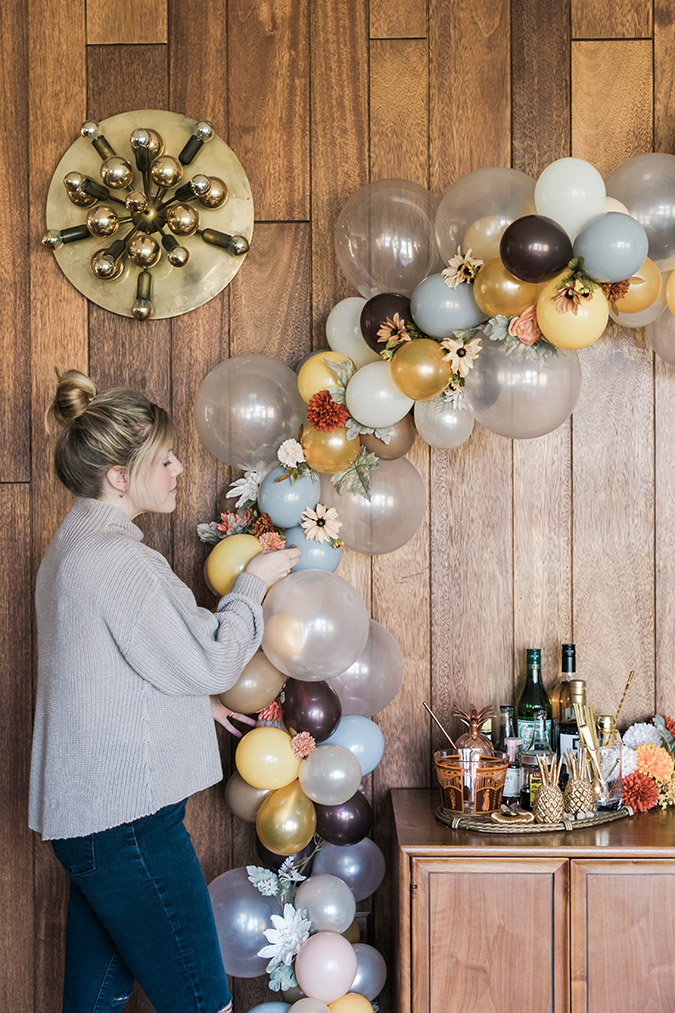
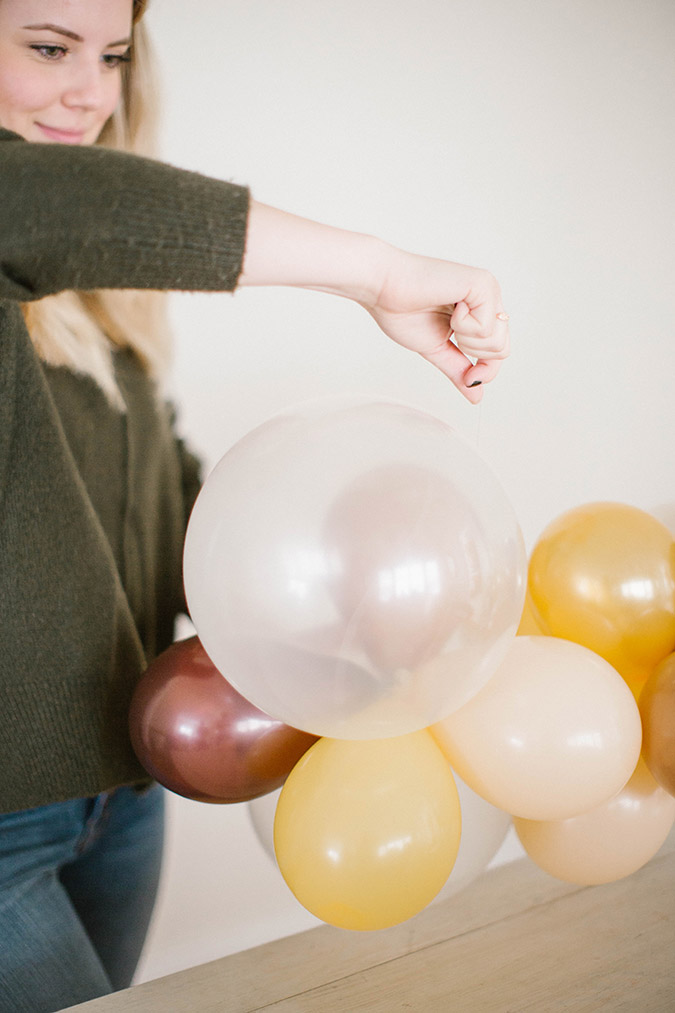
5. Take your fishing wire (leaving about two feet of slack to dangle from the end of your balloon arch) and wind it around the center of your first balloon cluster. Finish just this one by tying a knot around the center of your cluster so the end of your balloon arch stays secure.
6. To make your next balloon cluster in your arch, repeat steps 1-4. Note: For our balloon arch, we alternated clusters of 8 small balloons with clusters incorporating our large balloons. We made our clusters with the large balloons using only four small balloons, and a pair of two large balloons, totaling six balloons in these clusters.
7. To add your next cluster to the arch, place the balloon cluster as close as possible to your first on your fishing line, and nest the clusters together so there are little to no gaps.
8. Take your fishing line, and wind it in different directions around the center of your second cluster about 5 times, until it is secure. (As long as you wind your fishing line securely enough, there is no need to tie a knot around each cluster.)
9. Repeat steps 7-8 for each balloon cluster you add to your arch, until you’ve reached your desired length.
If you’d like to add more volume to the center of your balloon arch:
1. Create several stand-alone clusters using the same method as before.
2. Tie a long piece of fishing wire around the center of each cluster, so that you have two tails about a foot long on each side.
3. Using the fishing line “tails,” situate the cluster where you want it on your balloon arch, and tie the ends securely so that they wrap around the center fishing line in your balloon arch. (It also helps to wind the fishing line “tails” around some balloons in your arch before tying your knot for added security.)
4. Repeat this process until you’re satisfied with the volume and shape of your balloon arch.
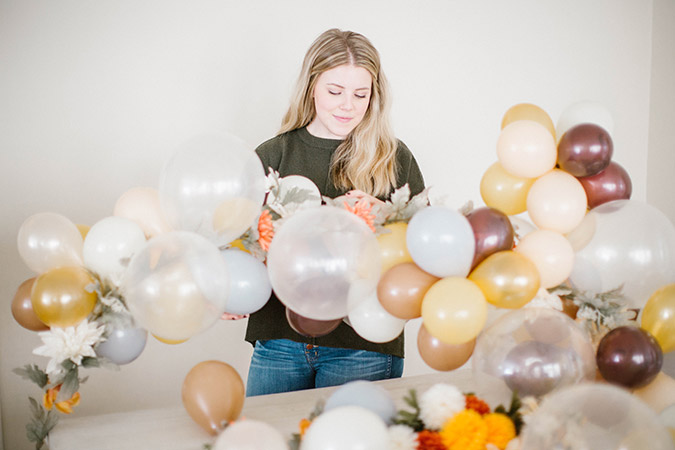
For the flower garland:

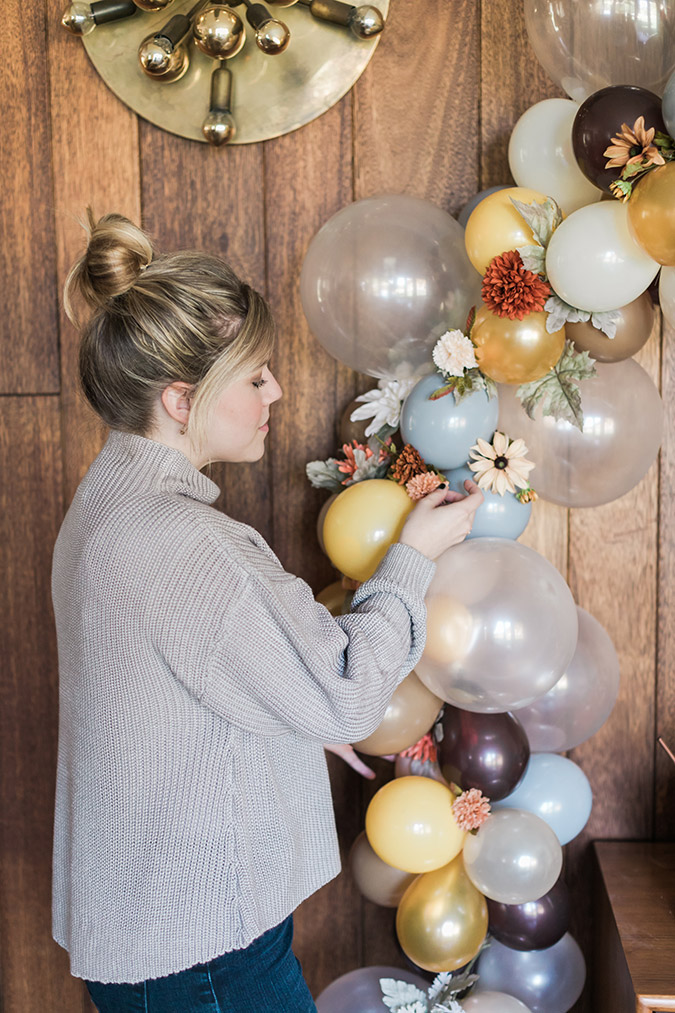
1. Start by trimming unnecessary fullness from your garland. (We clipped off some extra leaves and a few flowers so that we could wind the garland through the arch more easily. You can use these extra tidbits later!)
2. Weave your flower garland through your balloon arch, winding it up and down around your balloon clusters.
Note: Be careful of any sharp ends on your garland, and make sure to clip these off before you add it to your arch. They will pop your balloons if any ends are too sharp.
3. Once you have your garland wound through your arch, secure any weak spots with more fishing line so that they stay put.
4. Once your arch is hung up on the wall, go back and gently nestle any extra flowers you have into bare spots in your arch for added fullness.
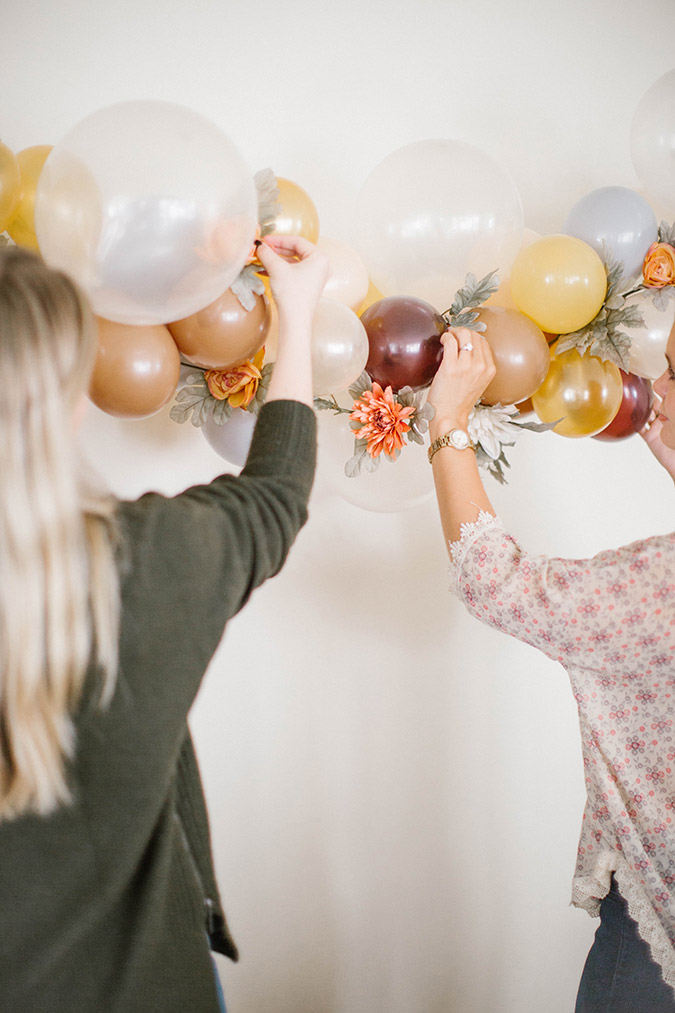
To hang your balloon arch:
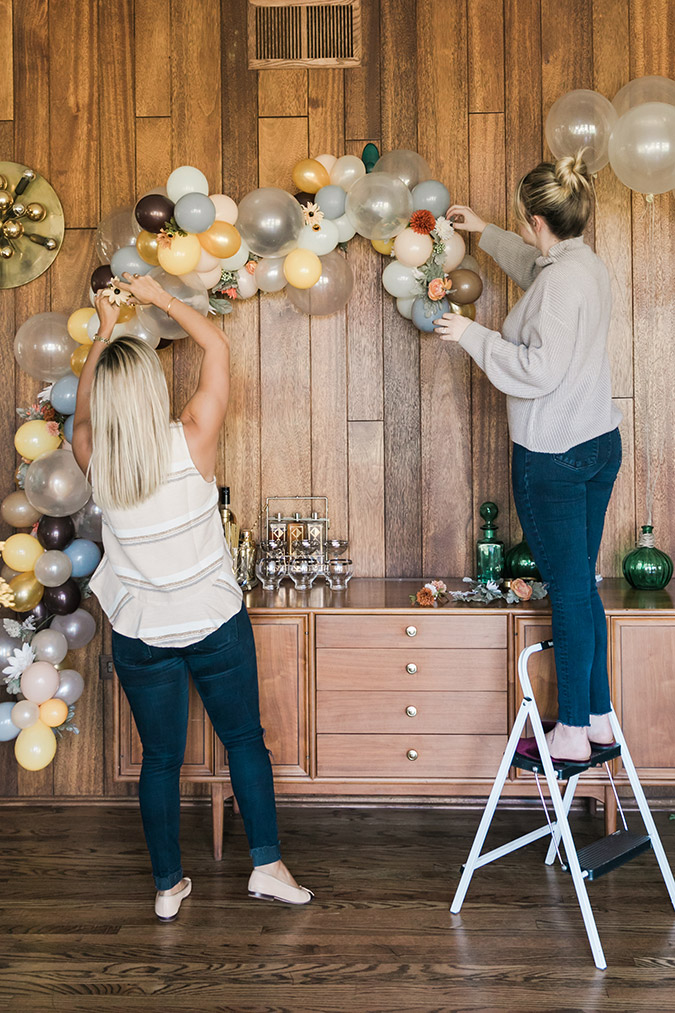
1. Start by deciding which end of your arch will be at the top, and which will be at the bottom. Have someone help you hold it up against the wall to see where you’ll want to situate it before you dive into securing it to the wall.
2. Have one person hold the arch in place while the other sticks temporary Command hooks to the wall at key points of your arch. (For example, we placed two hooks around the curve of the arch, and two behind the top end of the arch to hold it up.)
Tip: Make sure you have some extra hooks on hand, in case you have to rearrange any of them in the process. Once you use your hook once, it won’t be sticky enough to reuse and hold your arch up properly. It’s also a good idea to try to get fairly “heavy duty” hooks, even though your balloons are light. If the hooks are too flimsy or weak, they’ll easily fall off the wall when situating your arch.
3. Then, cut a fairly long piece of fishing twine and loop it around your arch, tying the ends of your line together on the hook behind your balloons. Repeat this step for each hook, and add any additional hooks where your arch is drooping.
Tip: Don’t hesitate to wind your fishing line around your balloons a few times as you secure it to the wall, if you feel that simply looping the line around your arch isn’t holding it securely enough to the hooks.
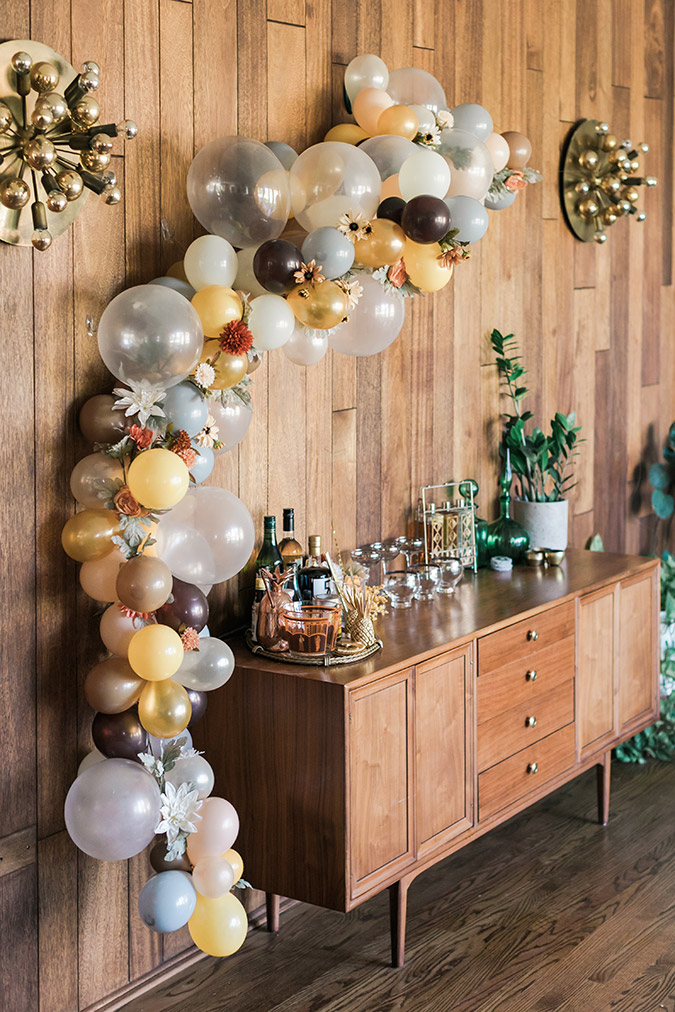


And voila! We’re absolutely in love with how our balloon arch turned out, and how perfectly it fit above the cocktail bar that we set up for our guests.
Cheers to a successful (and oh-so-fun to create) DIY project. The only hard part is waiting patiently for Thanksgiving to arrive…
If you love getting crafty as much as we do, and are inspired by our balloon arch, you can order your own Balloon Time Helium Tank by clicking HERE.
What will you be crafting up for the holidays this year?
XO Team LC
This post is proudly sponsored by…
Photos: Jessi Burrone and Valorie Darling for LaurenConrad.com


