Home Makeover: How to Build a Gallery Wall

Now, we won’t lie… this was a bit of a daunting project, as it’s not something you can really knock out in a day. It takes time, preparation, and patience. First you have to find the right wall, then you have to pick the perfect prints. Both of those steps seemed pretty easy to us. But then came the hard part… choosing which frames to use on each art piece, and actually assembling the wall. Lucky for us, the lovely and talented Dara of Simply Framed was on hand to help us through the process. Her company, Simply Framed, is a super affordable mail-in framing solution that lets you shop for custom framing online. They frame everything from prints, posters and photographs to original works on paper and unstretched canvases, so it’s safe so say that she’s an expert on the topic. Dara helped us choose which frames to use for each individual print and ultimately bring the gallery wall to life!
So to help all of you build your very own gallery wall, we put together our step-by-step tutorial, along with some expert tips from Simply Framed! Here we go…
What You’ll Need
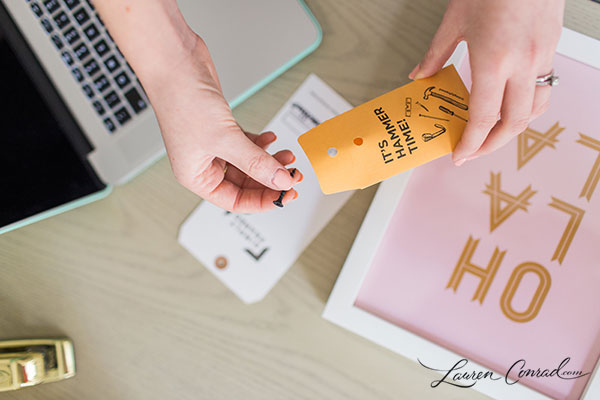
As far as tools go, here’s what you’ll need to create the gallery wall of your dreams…
- Hammer
- Nails
- Level
- Tape Measurer
- Pencil & Eraser
- Small Notebook (for writing down measurements)
- Phillip’s head screwdriver
- Extra nails and screws
- Blue painter’s tape
- Dara also recommends having a hair tie, a friend to keep you company (and help when needed), and a good playlist going
Pick Your Prints

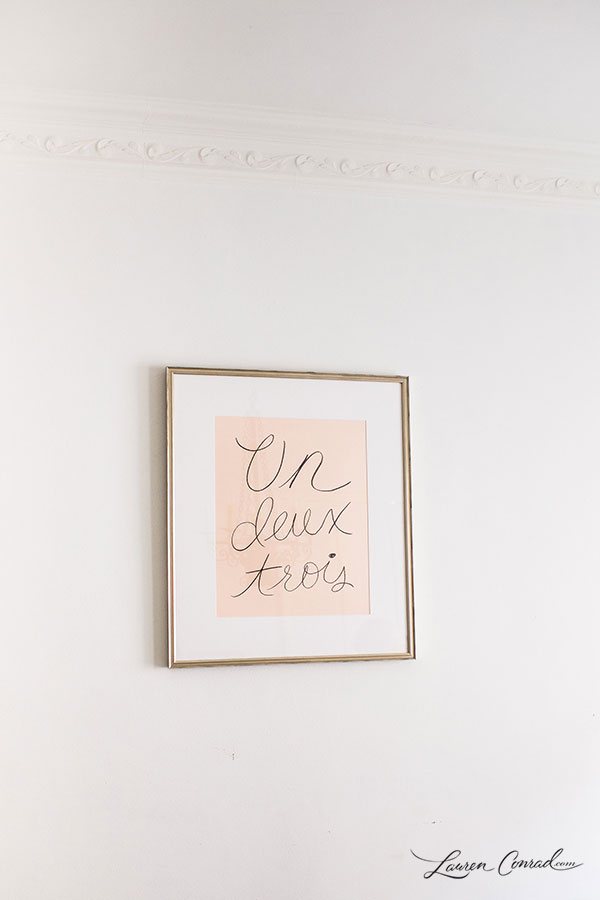
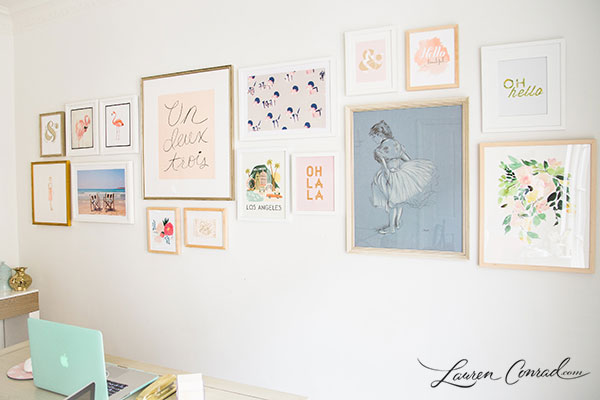
Now for the fun part! Accumulating prints and pieces for your gallery wall can be a long process, but we found it to be pretty fun. Dara says, “The most successful gallery walls are ones that combine a variety of art mediums and frame styles. If you’re looking for a foolproof way to make sure your art works together, choose pieces that have a common thread—a certain color for example. But you don’t have to limit yourself. The most important thing is for your wall to represent you—your tastes, your history, and the art you love most.” We scoured our favorite sites (and also pulled some vintage finds) to put together our collection of prints. The prints in our wall are from Lulu & Georgia, Rifle Paper Co., Gray Malin, Yellow Heart Art, The Flower Print Shop, Carrie Beth Taylor, Minted, along with a couple of vintage art pieces. And one more thing from Dara… when it comes to gallery walls, size does matter: “More important than focusing on the art type or scheme, it’s often the combination of sizes that makes or breaks a gallery wall. The key is making sure you start with a couple of larger pieces to anchor the wall.” For us, those pieces were the “Un Deux Trois” print from Rifle Paper Co. and the gorgeous blue vintage Degas.
Find Your Frames
When it comes to framing, it’s really a matter of personal preference. Simply Framed recommends framing each piece individually in a way that best complements the art. Dara says that using different frames for each print usually makes for a much more interesting gallery wall, and ensures that if you choose to hang it somewhere differently down the road, it will look phenomenal on its own! However, if you’d like you can definitely choose the same frame for each piece, which usually results in a very clean and classic look. For our wall, we had a lot of white, blush pink, gold, sand, and blue. So Simply Framed helped us choose frames with white, natural, antique gold, and antique silver frames, which each complemented the individual pieces but also made for a cohesive overall look.
Lay It Out
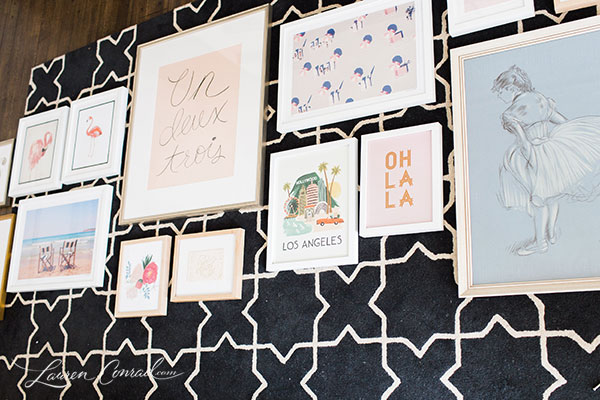
Dara recommends that you measure the amount of wall space you want to fill and then tape off that section on a clean floor. This allows you to space everything out the way you want in advance of securing it on the wall. Once you lock down your favorite arrangement, take a few photos for reference when you’re hanging. Luckily, we had a rug that was pretty much the exact size of the wall space we were using, so we assembled the layout of the prints on the rug first. We started by putting the Un Deux Trois print a little bit off-center, and built around that one. We paired put pieces next to each other that we thought looked like pairs (the flamingos, for example), and shifted things around until we found a layout that we all loved.
Hang it Up
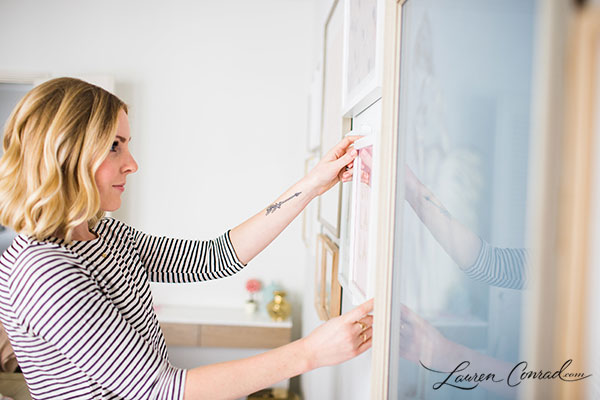
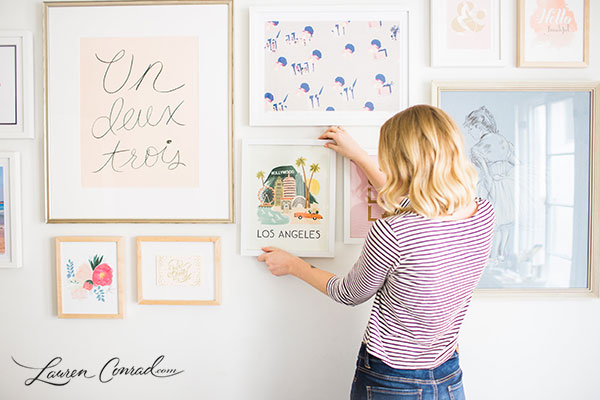
Then it was time to get the gallery onto the wall! Dara recommends that you always start by hanging the largest piece first. She prefers hanging it slightly off-center, to make sure that it doesn’t completely steal the show! If you don’t have one large piece, group two together for the illusion of a larger work. Once you’ve hung the largest piece, build off of that from the center outward with smaller pieces. Now, some people will trace the outlines of their prints, tape them to the wall, and then hang them. We decided to just rely on the photos we took of the layout, and it worked great (and we were able to skip a big, time consuming step). We had 2 people hanging prints, and 2 people standing on the other side of the room, making sure that everything looked even and was in the right place.
And here’s one tip from Simply Framed on the height of your gallery wall, “We recommend limiting the height of your gallery wall to two works, top to bottom (three if they’re super small). This generally keeps your art at eye-level, where it’s much easier for you and your guests to enjoy!”
However, you can throw this rule to the wind if you’re going for the full floor-to-ceiling look.
And there you have it! A gorgeous gallery wall, filled with prints made by our favorite artists and some friends, too.
Do you have any tips or tricks to add to the list?
And what do you think of our gallery wall?
XO Team LC


